Disclaimer: This post contains affiliate links. As an Amazon Associate, Dirty Derailleur earns from qualifying purchases at no extra cost to you. Read our full disclosure here.
Making the switch to clipless pedals can feel a bit intimidating—and let’s be honest, everyone falls over at least once while getting used to unclipping even if they don’t admit it! That’s exactly why diving headfirst into a $200+ pair of top-tier shoes isn’t necessary when you’re just starting out.
Starting with a budget-friendly pair of MTB clipless shoes gives you everything you need—a stiff, power-transferring sole and a secure cleat attachment—without the heavy price tag. It lets you test the waters, get comfortable with the clipping/unclipping motion, and figure out your personal fit preferences (like dial vs. strap closures) before making a bigger investment.
The right shoe can change your rides. Models like the Shimano XC102 show how a wallet-friendly option can still deliver solid power transfer and protection. The glass fiber/nylon sole is another example of durable, efficient design trickling down from higher-end models.
When you shop, think about sole construction, closure type, and cleat setup. Those things affect comfort, fit, weight, and how much power moves through your pedal stroke. Pick a shoe that offers reliable grip, some toe and heel protection, and a secure fit so you ride with confidence on climbs and trails.
In this guide, we’ll compare the 4 best budget MTB clipless shoes that deliver real performance, durability, and comfort without breaking the bank:
- Shimano XC102
- Giro Ranger
- Specialized Recon 1.0
- Giro Privateer Lace
Key Takeaways
- Balance pedal efficiency and trail protection when choosing shoes.
- Shimano XC100 is a top entry option that blends performance and price.
- Sole materials and closures shape comfort and power transfer.
- Proper cleat and pedal setup is essential for efficient pedaling.
- Look for secure fit, grip, and light protection for long rides.
Why Your Choice of Footwear Matters
Your footwear sets the tone for every ride, shaping comfort, control, and how much power reaches the pedals.
Your bike shoes are the main link between you and the bike. With only three contact points on the bike, a poor fit costs you energy and can cause numbness, says Phil Burt, former British Cycling physiotherapist.
Invest in a dedicated mountain shoe and you keep your foot in the right place for pedaling. A stiffer sole transfers power better and cuts fatigue on long climbs. Too-flexible soles make your foot work harder and tire fast.
Choosing the right clipless setup also matters. It lets you pull up as well as push down, boosting climbing efficiency on steep trails. Proper cleat position and a secure fit stop your foot from sliding inside the shoe during hard efforts.
- Secure fit prevents hot spots and loss of power.
- Good tread and rubber soles give grip when you need to walk with the bike.
- Many lower-price options still offer durable soles and solid performance.

Understanding the Best Budget MTB Clipless Shoes For Beginners
For new riders, a shoe that balances stiffness and walkability speeds skill gains and keeps rides fun.
Entry-level bike shoes are built to be more forgiving than pro racing models. They use a two-bolt cleat pattern that works with popular Shimano PD-M520 clipless pedals. That makes setup simple and widely compatible.

Most options have synthetic leather uppers that stand up to mud and clean easily. A grippy rubber outsole and clear tread help when you need to walk the bike on steep trails.
- Two-bolt cleat marks on the sole make alignment easier.
- Balanced stiffness gives good power transfer without killing comfort.
- Durable upper materials and solid soles hold up to regular riding.
Pick a reputable brand and a proper fit. That ensures comfort, consistent performance, and longer life from your purchase.
Balancing Pedal Efficiency and Trail Durability
Finding the right mix of stiffness and traction makes a huge difference once you hit rough singletrack.
Start by thinking about power transfer. A stiffer sole channels your effort straight into the pedal so climbs feel easier and your pedaling becomes more efficient. Too much stiffness, though, makes ‘hike-the-bike’ sections painful and slower when you need to walk the bike.
Power Transfer
Look for a sole that gives firm support without being brutal on your foot. Some models aim for a middle ground to keep weight down and comfort up. The Crankbrothers Mallet Lace, at 880g, shows how manufacturers balance durable construction with trail-ready weight.
Grip Requirements
Grip matters as much as stiffness. A sticky rubber compound helps your foot stay planted on pedals and gives traction when you step off the bike. Reinforced toe boxes protect your feet from rocks and roots, and a secure cleat setup keeps you confident when pushing hard on technical terrain.
- Stiff soles = better power, but lower walkability.
- Rubber tread and reinforced toe boxes boost durability and traction.
- Match shoe type to your riding—XC, trail, or mixed terrain—to get the right balance.
Essential Features to Look For
Prioritize fit systems, sole design, and durable uppers to get the most from every ride.
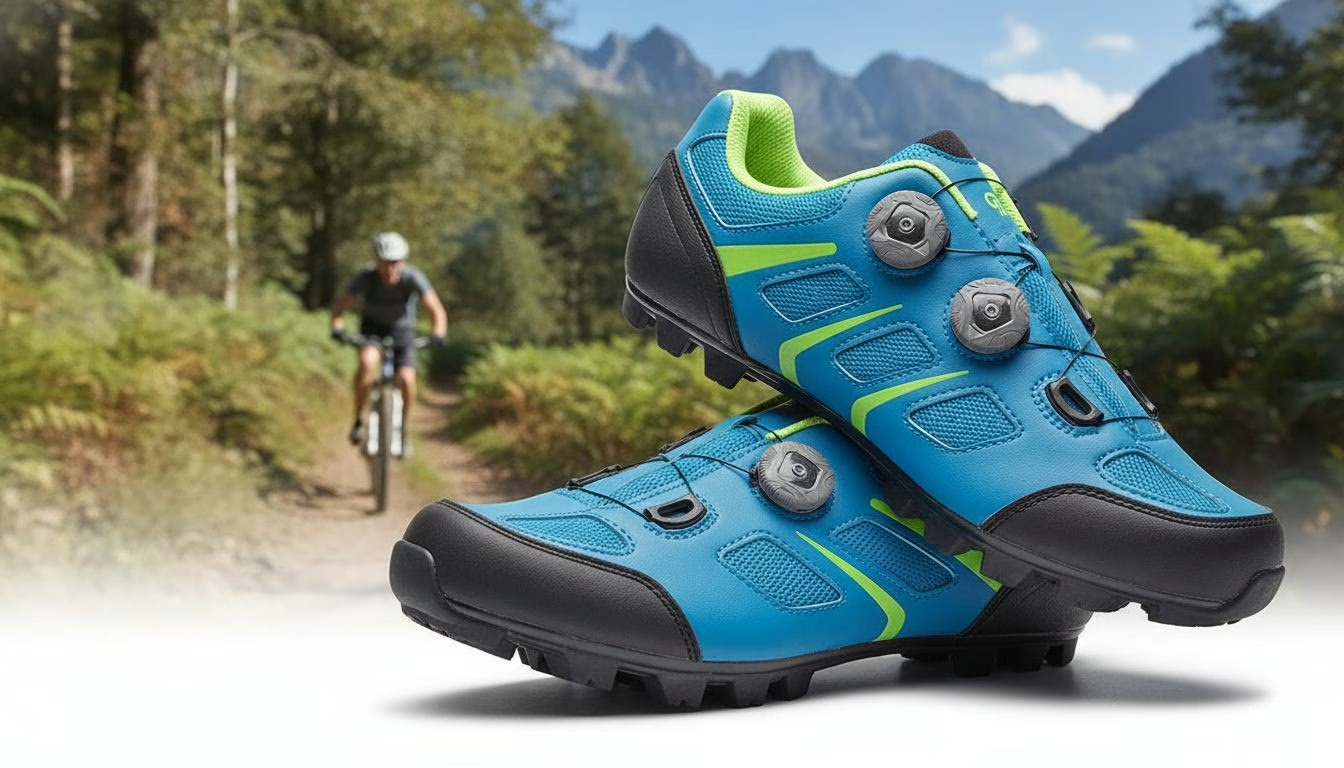
Look for a closure that lets you fine-tune fit on the trail. BOA®Dial systems like the Specialized Recon 1.0 give even pressure across the top of your foot and make mid-ride tweaks easy. Velcro straps or laces work too but check how secure they stay when you sweat.
- Breathable mesh panels keep feet cool on long efforts and reduce odor build-up.
- A deep heel cup stops your foot from lifting when you pull up on the pedals and boosts pedaling efficiency.
- Durable uppers and replaceable heel grips extend life when you brush against rocks or roots.
- Soles should balance stiffness and walkability; rubber tread adds grip for hike-the-bike sections.
- Ensure enough cleat adjustment range to match your pedal type and personal biomechanics.
Finally, check ankle padding and toe protection so you get comfort and support without hot spots. The right combination of these features saves you time and improves performance on varied trails.
Our 4 Recommendations for Entry-Level Riders
Start your gear list with models that feel solid and encourage you to ride more often.
Here are four top-rated budget-friendly options that deliver premium features without the steep price tag:
1. Shimano XC102 — Best Pure Value & Classic Fit
MSRP: ~$100 – $120 | Closure: Triple Velcro Straps | Best For: XC & Casual Trail Riders

The Shimano XC102 (SH-XC102) is a quintessential entry-level cross-country shoe that nails the basics. Featuring a perforated synthetic leather upper for airflow and a sleek surround-wrapping fit, it provides a surprisingly comfortable feel out of the box.
- Why it’s great for beginners: The classic three-strap hook-and-loop closure makes micro-adjustments quick and foolproof on the trail. Its glass-fiber reinforced nylon midsole provides efficient power transfer without feeling overly harsh on long rides.
- Key Feature: Offset strap design reduces tension at the highest point of the foot to eliminate pressure spots.
2. Giro Ranger — Best Rugged All-Rounder
MSRP: ~$75 – $100 | Closure: Triple Velcro Straps | Best For: Rugged Trail & All-Mountain Riding

If you ride loose, rocky, or muddy trails where you might need to dismount, the Giro Ranger stands out. Built with Giro’s Synchwire™ stitch-less upper, it blends lightweight mesh ventilation with thermo-bonded durability.
- Why it’s great for beginners: Unlike stiffer, slick-soled XC race shoes, the Ranger features a dual-injected rubber outsole with aggressive lugs. This gives beginners confident, slip-free traction when walking up technical trail sections or hike-a-biking.
- Key Feature: Co-molded rubber/nylon sole for exceptional off-bike grip.
3. Specialized Recon 1.0 — Best Micro-Adjustability & Walking Comfort
MSRP: ~$140 | Closure: BOA® L6 Dial | Best For: Trail, Gravel & All-Day Comfort

For beginners who want modern BOA dial closure technology without breaking the bank, the Specialized Recon 1.0 is an outstanding upgrade. Equipped with a BOA L6 dial and Dyneema soft-lace guides, it offers precise, single-millimeter fit adjustments on the fly.
- Why it’s great for beginners: It incorporates Specialized’s STRIDE Toe-Flex technology, which allows the toe box to flex naturally when walking while maintaining a rigid cleat pocket for efficient pedaling. It bridges the gap between bike efficiency and off-bike mobility.
- Key Feature: Body Geometry ergonomics to align hips, knees, and feet, reducing the risk of fatigue or injury.
4. Giro Privateer Lace — Best Custom Fit & Trail Style
MSRP: ~$70 – $100 | Closure: Laces | Best For: Gravel, Trail & Riders Wanting Tailored Tension

Laced cycling shoes have surged in popularity, and the Giro Privateer Lace brings that casual aesthetics and custom fit to the budget market. Laces eliminate hot spots by allowing independent tension across seven distinct eyelet points.
- Why it’s great for beginners: Laces are virtually indestructible and foolproof—there are no ratchets or dials to snag or break during a minor beginner tip-over. The microfiber upper breaks in quickly, while a reinforced rubber toe cap guards against rock strikes.
- Key Feature: Tubular woven laces that hold a tight knot without slipping, plus toe spike compatibility for sloppy conditions.
Feature Comparison: Best Entry-Level MTB Shoes
| Feature | Shimano XC102 | Giro Ranger | Specialized Recon 1.0 | Giro Privateer Lace |
| Closure System | 3 Velcro Straps | 3 Velcro Straps | BOA® L6 Dial | Laces |
| Midsole Material | Glass-Fiber Nylon | Nylon Composite | Injected Nylon | Nylon & Glass-Fiber |
| Sole Traction | Rubber XC Tread | Dual-Injected Rubber | SlipNot™ Rubber | Aggressive Rubber Lug |
| Cleat Standard | 2-Bolt SPD | 2-Bolt SPD | 2-Bolt SPD | 2-Bolt SPD |
| Weight (Approx. Size 42) | ~334 g | ~315 g | ~291 g | ~355 g |
| Walkability | Moderate | Good | Excellent (STRIDE Tech) | Good |
| Best Highlight | Unbeatable Price | Durable Off-Bike Grip | Precision Dial Fit | No-Hot-Spot Custom Fit |
How to Choose: BOA® vs. Straps vs. Laces
When buying your first pair of mountain bike shoes, the closure system is one of the biggest choices you’ll make. It directly impacts fit, convenience, durability, and price.
Here is how the three main closure styles compare for beginner riders:
1. Velcro Straps (Shimano XC102, Giro Ranger)
Three-strap hook-and-loop systems are the traditional choice for entry-level cycling footwear, and for good reason—they are simple, reliable, and keep costs down.
- Pros:
- Foolproof & Durable: No moving mechanical parts or strings to break during a slow-speed beginner tip-over.
- Quick On/Off: Fastest style to put on and pull off at the trailhead.
- Budget-Friendly: Keeps shoe prices under/ around $100.
- Cons:
- Less Precise Tension: Harder to fine-tune tightness across tiny increments compared to dials or laces.
- Wear Over Time: Velcro can collect mud, dirt, and trail debris over time, slightly reducing grip strength.
2. BOA® Dials (Specialized Recon 1.0)

BOA® systems use a micro-adjustable dial connected to a strong steel or synthetic cable. Turning the dial pulls the cable evenly across the shoe.
- Pros:
- Micro-Adjustability: Adjust fit by single millimeters on the fly—even while actively pedaling—without unbuckling.
- Even Pressure: Distributes tension evenly along the tongue to minimize pressure spots.
- Sleek Look: Modern, low-profile aesthetics.
- Cons:
- Higher Cost: Dials typically bump shoe prices up by $30 to $50.
- Impact Risk: Direct strikes against rocks or trees can occasionally crack or jam the dial mechanism (though BOA offers lifetime replacement warranties on dials).
3. Laces (Giro Privateer Lace)
Traditional laces have made a huge comeback on trail and gravel shoes because they offer an unmatched custom fit.
- Pros:
- Eliminates Hot Spots: Seven distinct eyelet pairs let you tune tension independently across different zones of your foot (looser near toes, tighter at the ankle).
- Indestructible Simplicity: If a lace breaks, a $3 replacement fixes it immediately—no proprietary parts required.
- Casual Aesthetic: Looks great off the bike if you stop at a café or trailhead post-ride.
- Cons:
- Zero On-the-Fly Adjustments: You have to pull over and untie your shoes to make a fit adjustment mid-ride.
- Mud & Safety Hazard: Wet, muddy laces take longer to clean, and loose lace loops must be tucked safely into lace keepers to avoid catching on crank arms or chainrings.
The Verdict for Beginners:
- Pick Velcro Straps if you want the most affordable, low-maintenance option.
- Pick BOA Dials if you value quick, ultra-precise adjustment while riding.
- Pick Laces if you struggle with wide feet or sensitive hot spots and want a tailored, comfortable wrap.
Choose a proven model so you can focus on skill development instead of gear issues. A proper cleat setup and firm soles will boost efficiency and keep your feet confident on varied trails.
Why Stiff Soles Improve Your Climbing
Stiffer soles make each pedal stroke count, so climbs feel like less of a struggle and more like steady progress.
A rigid sole limits flex around the pedal platform. That means your power transfer goes directly into the pedal instead of bending the shoe. You feel the difference on long, steep climbs and when you push hard from a stop.
Modern materials like carbon and glass-fiber give stiffness without extra weight.
- Stiff soles reduce foot fatigue and numbness on long rides.
- A firmer platform improves handling and control on technical sections.
- Moderately stiff options balance comfort and climbing performance for most riders.
- Too-flexible soles sap energy and slow your progress uphill.
Upgrading to a shoe with a stiffer sole often gives an immediate boost in climbing speed and pedal efficiency. Match the sole stiffness to your riding style and you’ll get better results without sacrificing comfort.
The Role of Tread Patterns in Technical Terrain
When trails turn sloppy, the tread under your foot decides whether you slip or stick.
On technical mountain lines you will often hike or scramble with the bike. A well-designed tread pattern helps your shoe shed mud so lugs don’t pack up and lose traction.
Mud Shedding Capabilities
Aggressive lugs give bite in soft dirt and help you push your bike up steep, muddy pitches. The rubber compound also matters; tacky rubber grips wet rocks and roots better than hard, slick mixes.
- Widely spaced tread sheds mud quickly and keeps soles light during long rides.
- Aggressive lug shape improves off-bike traction and keeps your feet steady when clipped to pedals.
- Some shoe models, the Giro Privateer Lace, for example, accept toe studs to boost traction in extreme, slippery terrain.
Pick a shoe with the right tread for the trails you ride. That choice protects your feet, keeps you moving, and raises your confidence when the ground goes soft.
How to Ensure a Proper Fit
A correct fit turns a ride from painful to effortless and keeps your focus on the trail.
Afternoon Sizing
Try on new shoes in the afternoon or evening. Your feet swell as the day goes on and that gives a realistic size for long rides.
If you are between sizes, pick the larger one. You can add a thicker insole or sock to help it fit better.
Sock Thickness
Test with the socks you plan to wear on the bike. Thicker winter socks need more room in the toe box and change how the cleat aligns under your foot.
- Bring both thin and thick socks when trying sizes.
- Check heel hold and ankle clearance after tightening straps or laces.
- Confirm the rubber tread under the sole still lets you walk comfortably.
Arch Support
Many riders gain comfort and prevent numbness with custom inserts or off-the-shelf arch supports. A stable arch keeps the cleat aligned and boosts pedaling efficiency.
Consider a professional shoe fitter if you have persistent pain. Proper support improves comfort, performance, and long-term foot health.
Differences Between Two-Bolt and Three-Bolt Cleat Systems
Two common cleat systems shape shoe design, pedal feel, and on-trail comfort in different ways.
Two-bolt systems (SPD) are the gold standard for mountain biking. The cleat sits recessed in the sole so you can walk on rocks and roots without slipping. That recessed design also keeps mud out of the tread and makes off-bike hikes less awkward.
Three-bolt systems, like SPD-SL, use a larger plate under the shoe and are the standard for road cycling. That bigger contact area improves power transfer to the pedal and suits road-style efforts. However, the cleat sits on top of the sole, which lowers walkability on rough trails.
- Two-bolt: better walkability, recessed cleat, common on mountain shoes.
- Three-bolt: more pedal contact, higher power for road riding, poorer grip and walkability off-bike.
- Always match your shoes and pedals to avoid compatibility problems and get the right fit and comfort for your riding style.
Quick Cleat Setup Tip
When mounting your cleats, push them slightly behind the ball of your foot; a more rearward cleat placement reduces calf fatigue and gives you significantly better bike control when descending technical trail sections.
For more detailed help and advice regarding setting up your SPD clipless pedals shoes, go and check my article: Shimano SPD Clipless Pedals: Setup and Tips for Beginners for a full walkthrough with a couple of invaluable personal tips to help you to set them up properly.
Protecting Your Feet on the Trail
When the trail gets rough, the right protection keeps your feet riding through, not sidelined by a scrape or bruise.
Dedicated mountain biking shoes use reinforced materials to shield your foot from debris and impacts. A reinforced toe box and solid heel cup stop rocks and roots from causing real damage.
The Shimano XC102 is a clear example: it gives extra grip and robust protection for gravity-focused mountain lines. That kind of design helps you ride harder on steep, technical sections.
- Reinforced toe box and heel cup to block impacts and abrasions
- Durable synthetic upper to resist cuts and keep feet dry
- Extra midsole padding to absorb hits and reduce foot fatigue
- Extended cuff or ankle protection on some models to prevent crank rub
In technical terrain, a protective shoe creates a barrier between your foot and the trail. That lets you focus on line choice and pedal control instead of worrying about pain or cuts.
Tips for Testing Shoes Before You Buy
Put shoes through simple, real-world checks before you commit. Try them on with the socks you usually wear so size and toe box feel match what you ride in.
Visit a local bike shop to sample different brands and upper shapes. Walk around the store to spot pressure points, heel lift, or odd rubbing that could worsen on long rides.
- Clip into a demo pedal or mimic pedal motion to check cleat range and float for your pedals and knees.
- Test closure systems—dial, velcro, or laces—to ensure even pressure without hotspots across the top of your foot.
- Consider sole stiffness, weight, grip, and tread for the trails you ride; a heavier, stiffer sole improves power but may hurt walkability.
- If buying online, pick retailers with easy returns so you can try sizes and confirm comfort at home.
Take time testing and you’ll avoid a poor fit that reduces efficiency and comfort on the bike. Proper checks now save you from swapping cleats, sore feet, or wasted price later.
Maintaining Your Gear for Longevity
Treat your bike shoes like precision gear: clean, dry, and inspect them after rides to keep performance high.
After a muddy mountain ride, brush off dirt from the upper and sole with a soft brush and mild soap. That prevents grit from abrading the rubber and wearing down tread and lugs.
Keep Velcro straps free of debris so they hold properly. Air dry your shoe naturally away from heaters or direct sun to stop glue and synthetics from failing.
- Check cleats regularly and swap them when clipping becomes stiff or unreliable.
- Inspect soles for loose lugs and repair small issues early to avoid bigger damage.
- Store your shoes in a cool, dry place to avoid bacteria and keep them smelling fresh.
- Wipe down the upper and re-tighten fasteners before your next ride to maintain fit and comfort.
Small, consistent care extends the life of your pedals, shoe parts, and overall kit. A little maintenance saves you pricey replacements and keeps your feet ready for every trail.
Common Mistakes Beginners Make
New riders often trip up by skipping basic pedal practice before hitting real trails. Spend a few minutes clipping in and out while stationary so you don’t panic the first time you need a quick dismount.
Picking a shoe that’s too stiff or too flexible for your riding hurts comfort and performance. A mismatched sole can tire your feet or make hike-the-bike sections miserable.
Bad cleat placement is another frequent error. Poor alignment causes knee pain and wastes power on climbs, so fine-tune the cleat and test on a short loop.
Ignoring tread pattern or a cramped toe box leaves you slipping on muddy slopes and struggling when you walk the bike. Make sure the rubber tread and toe area suit the trails you ride.
- Practice clipping in and out in a safe area before you ride full trails.
- Check cleat position and test for comfort and power transfer.
- Match sole stiffness and tread to your riding type and weight.
- Keep Velcro, laces, and the upper clean to extend shoe life and fit.
Conclusion
.Good riding starts under your feet — the right pair keeps you efficient, safe, and confident. Focus on sole stiffness, reliable closures, and a secure fit to balance pedaling power with walkability.
Remember that footwear is a main contact point that dictates control on technical terrain. Prioritize protection in the toe and heel so long days do not turn into sore ones.
Practice clipping and test several options, then care for your gear to extend life and performance. With the right shoes and a bit of time, clipless riding will open a new level of speed and enjoyment.